Welcome to the creative side of your business! Making your digital menu look stunning and perfectly aligned with your brand takes just a few taps on eMenu AI. Follow these 5 easy steps to customize your menu's design:
Make sure you are logged into your account and looking at your main Home dashboard.
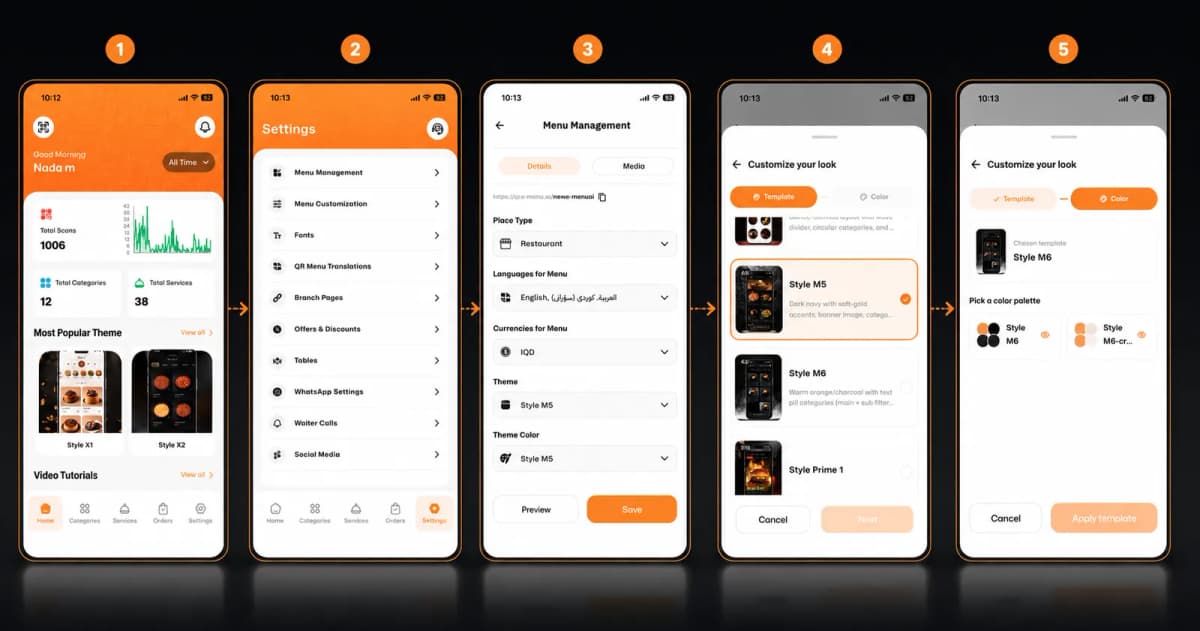
Step 1: Navigate to Settings
Start from your main dashboard where you can see your total scans and categories. Look at the bottom navigation bar and tap on the Settings icon in the bottom right corner.
Step 2: Open Menu Management
Once you are inside the Settings menu, tap on Menu Management. This is your control center for all the core details of your digital menu.
Step 3: Access Theme Options
Scroll down the Menu Management page until you find the Theme and Theme Color dropdown sections. Tap on the Theme option to begin styling your menu.
Step 4: Choose Your Template
You will be taken to the "Customize your look" screen. Make sure you are on the Template tab. Browse through our premium modern layouts (like Style M5, Style M6, etc.) and select the one that best fits your restaurant's or café's vibe.
Step 5: Pick a Color Palette and Apply
Finally, switch over to the Color tab located right next to the Template tab. Pick a color palette that perfectly matches your brand identity. Once you are happy with your choices, click the Apply template button at the bottom to save your beautiful new design!
🎉 Congratulations!
Your menu looks incredible! Your newly customized digital menu is now live, beautifully reflecting your brand, and ready to impress your customers.