Welcome back! Organizing your menu is crucial for providing a seamless customer experience. Setting up a new subcategory on eMenu AI is quick and easy. Follow these 4 simple steps to get started:
*This smart link automatically redirects you to the Apple App Store, Google Play, or Web App based on your device.
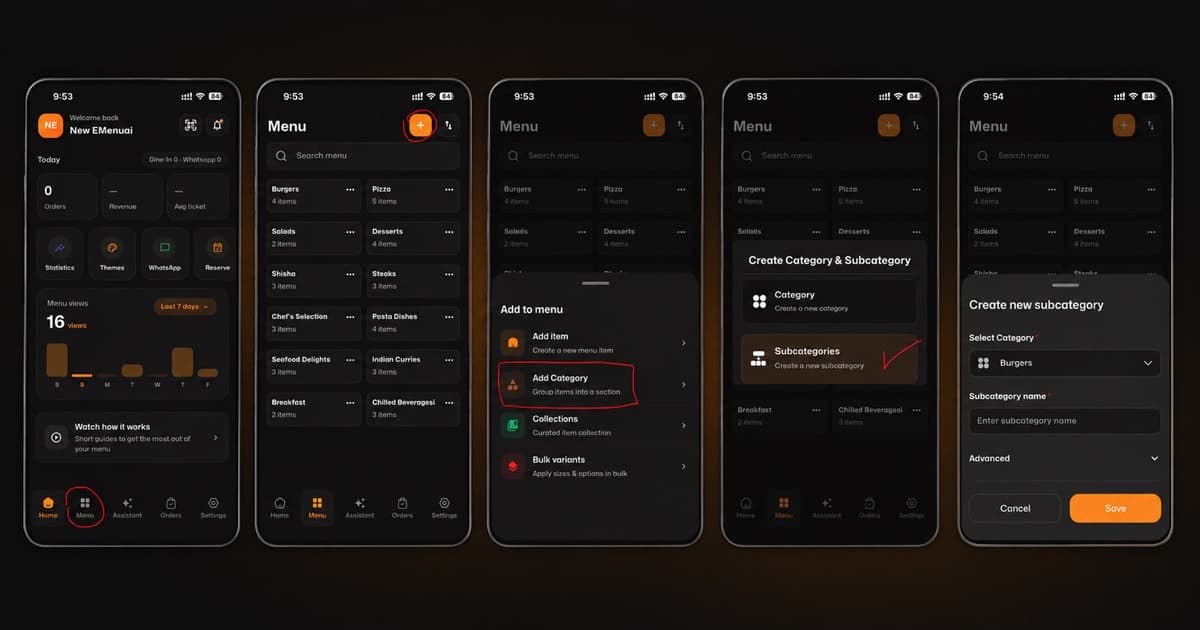
Step 1: Open the Menu
First, open your eMenu AI app. On the home dashboard, look at the bottom navigation bar and tap on the Menu icon.
Step 2: Add a New Category
Once you are on the Menu page, tap the orange + button located at the top right corner of the screen. From the pop-up list that appears at the bottom, select Add Category (Group items into a section).
Step 3: Choose Subcategory
A new window will pop up asking you to choose between creating a Category or a Subcategory. Tap on Subcategories (Create a new subcategory).
Step 4: Fill in Your Details
Now it’s time to set up your subcategory:
Select Category: Choose the main category it belongs to from the dropdown menu (e.g., Burgers).
Subcategory name: Type in the specific name for your new subcategory.
Once you are done, hit the orange Save button.
🎉 Congratulations!
Your subcategory is now successfully created. Your digital menu is more organized and easier for your customers to navigate!