Welcome! Managing multiple locations for your business has never been easier. Setting up your multi-branch pages on eMenu AI is quick, simple, and keeps all your locations organized. Follow these 5 easy steps to get started:
*This smart link automatically redirects you to the Apple App Store, Google Play, or Web App based on your device.
1️⃣ Step 1: Navigate to Settings
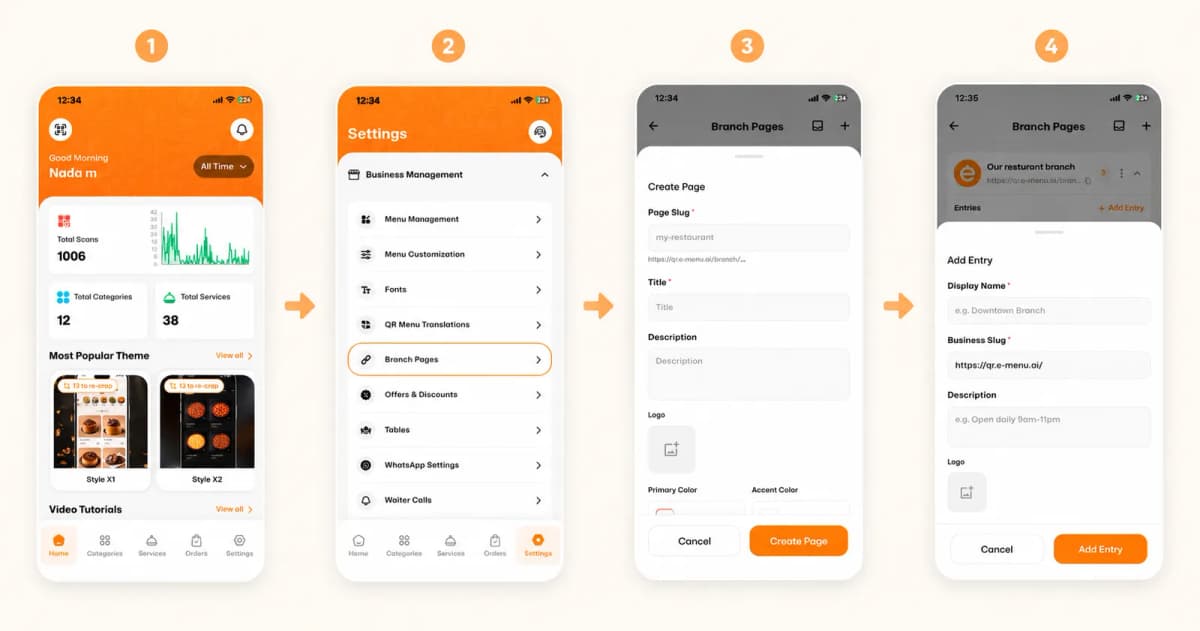
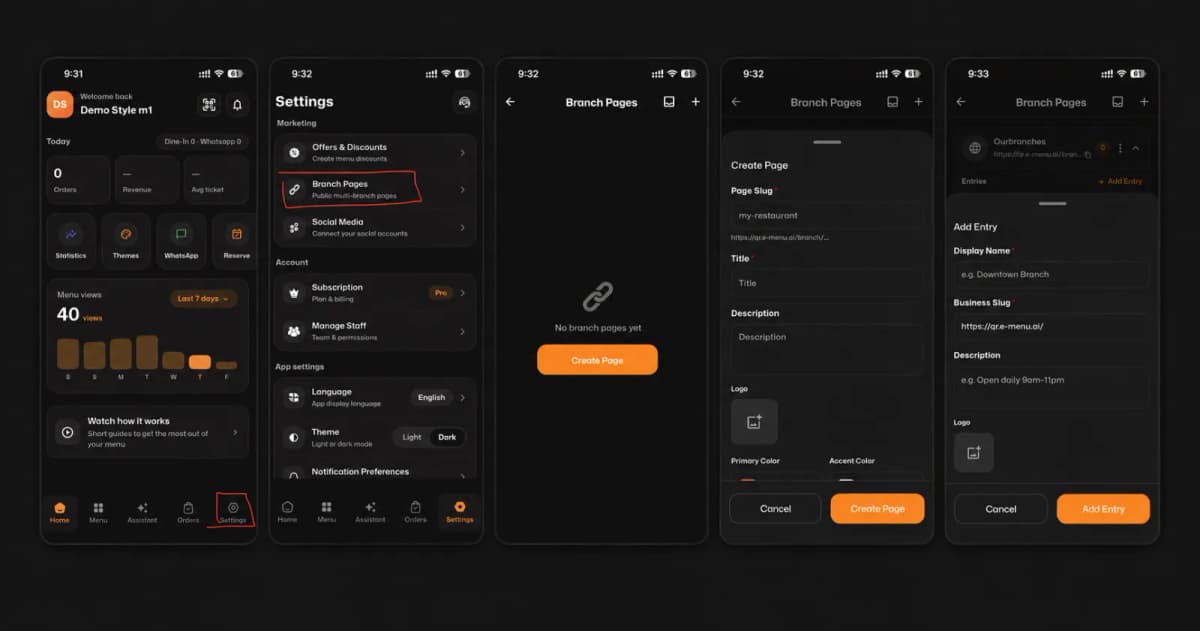
First, open the app and look at the bottom menu. Tap on the Settings icon located at the bottom right corner of your screen.
2️⃣ Step 2: Access Branch Pages
Next, scroll down to the "Marketing" section. Tap on Branch Pages (Public multi-branch pages) to begin setting up your locations.
3️⃣ Step 3: Create a New Page
If you haven't created any branches yet, you will see an empty screen. Tap the big orange Create Page button to start.
4️⃣ Step 4: Fill in Page Details
Now it’s time to set up the main hub for your branches. Please provide:
Page Slug: A unique URL identifier for your brand (e.g., my-restaurant).
Title & Description: The main name and details of your business.
Logo & Colors: Upload your Business Logo and choose your Primary and Accent colors to match your brand identity.
Tap Create Page when you are done.
5️⃣ Step 5: Add Individual Branches
Finally, add your specific locations! Tap Add Entry and fill in the details for each branch:
Display Name: The name of the specific branch (e.g., Downtown Branch).
Business Slug: The unique link for this specific location.
Description: Operating hours or location details (e.g., Open daily 9am-11pm).
Upload a specific Logo for that branch if needed, and tap Add Entry.
🎉 Congratulations!
Your multi-branch page is successfully created. You are now ready to share all your amazing locations with your customers seamlessly!