Welcome to the next level of business management! If your restaurant, café, or business operates in multiple locations, setting up Branch Pages on eMenu AI is quick, simple, and helps you stay perfectly
organized. Follow these 4 easy steps to get started:
📲 Download or Open eMenu AI
Ensure you are logged into your account and starting from your main home dashboard.
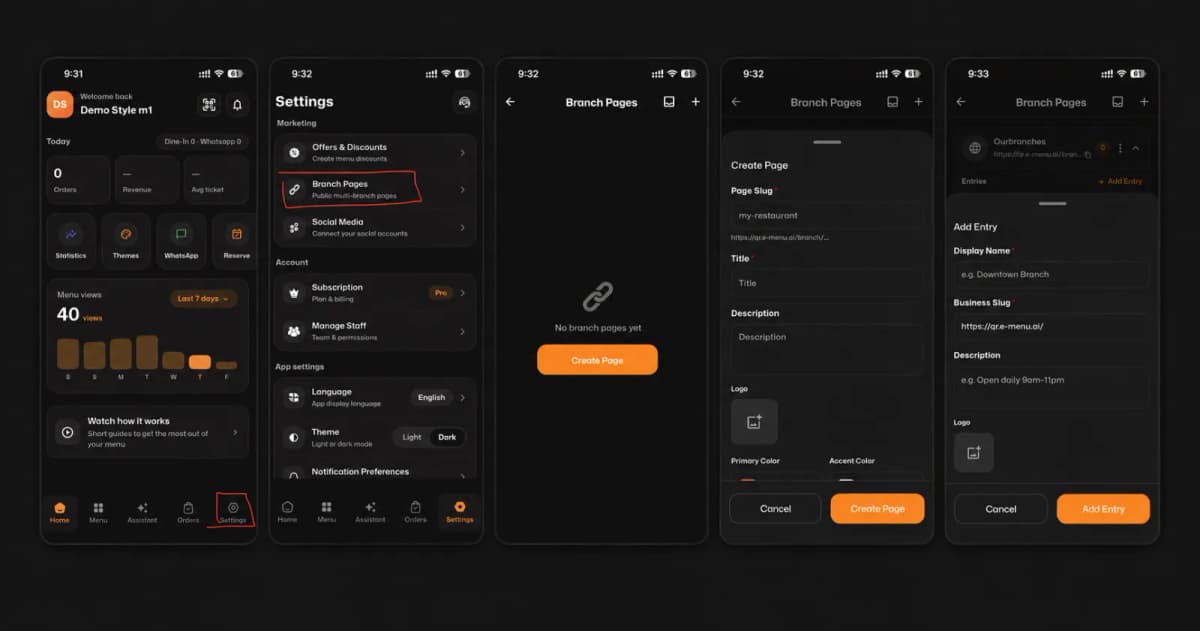
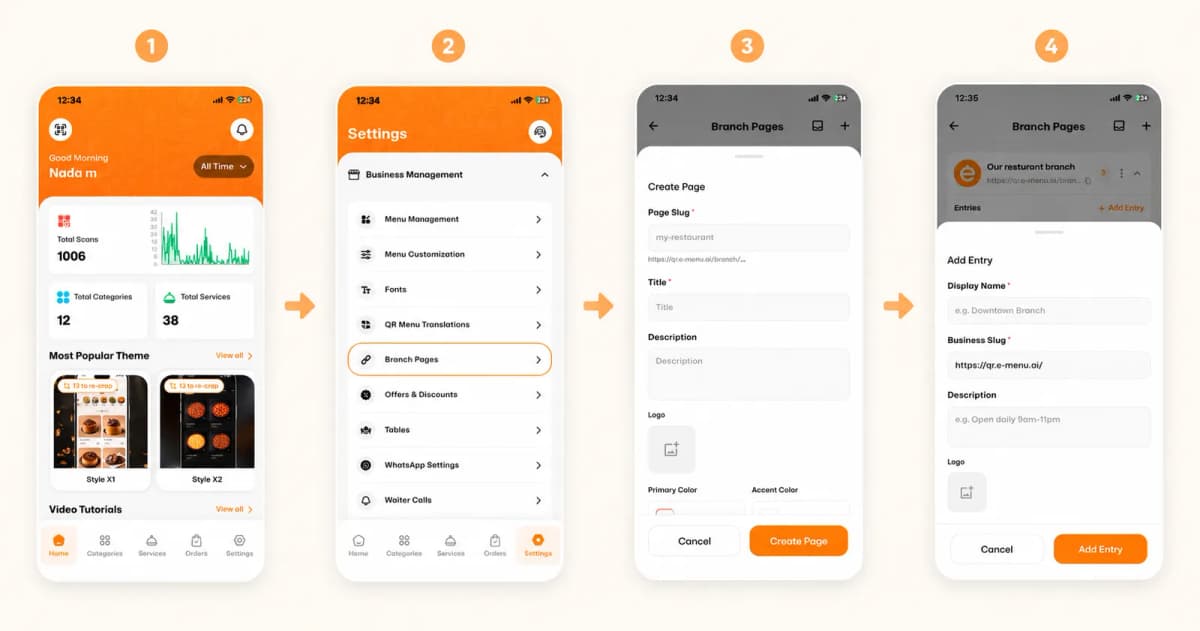
Step 1: Navigate to SettingsFirst, look at the bottom navigation menu on your dashboard. Tap on the Settings icon (the gear symbol) located
at the far right corner of your screen.
Step 2: Select Branch Pages
Inside the Settings menu, locate the Business Management section. Scroll through the options and tap on Branch Pages to begin managing your different locations.
Step 3: Create Your Main Page
Now, set up the foundation for your branches. You will need to fill in the following details:
A unique Page Slug (e.g., my-restaurant).
A clear Title and a brief Description.
Upload your Logo and customize the page by selecting your Primary Color and Accent Color.
Tap the orange Create Page button to save.
Step 4: Add Individual Branch Entries
Finally, it’s time to add your specific locations! Tap + Add Entry and provide the details for each individual branch:
Display Name (e.g., Downtown Branch).
Business Slug (the specific link for this branch).
Description (perfect for adding details like Open daily 9am-11pm).
An optional Logo specific to that location.
Tap Add Entry to complete the process.
🎉 Congratulations!
Your branch setup is complete! You have successfully organized your locations, making it easier than ever to manage your growing business and provide a seamless customer experience with eMenu AI!
Get Started Now 🚀