How to Set Up Dine-In Ordering & Tables on the eMenu AI App: A Step-by-Step Guide
Welcome to the future of dining management! Setting up your dine-in orders and tables on eMenu AI is quick, simple, and gives your customers a seamless experience. Follow these 3 easy steps to get started:
*This smart link automatically redirects you to the Apple App Store, Google Play, or Web App based on your device.
Step 1: Enable Dine-In Ordering
First, open the app and navigate to your settings to activate the feature:
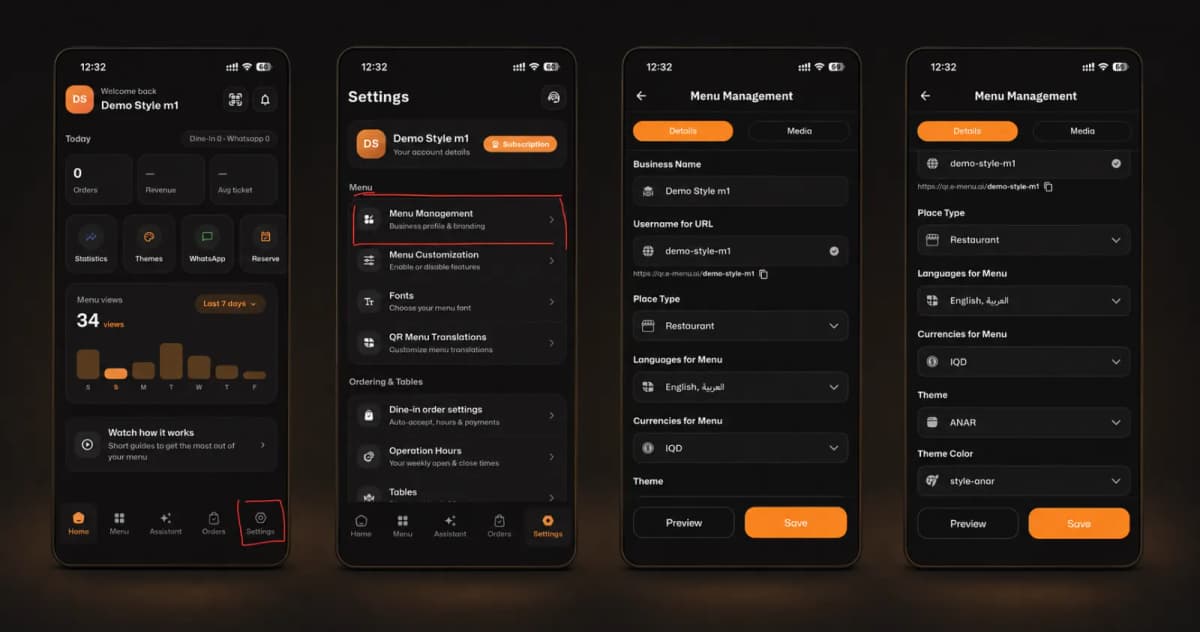
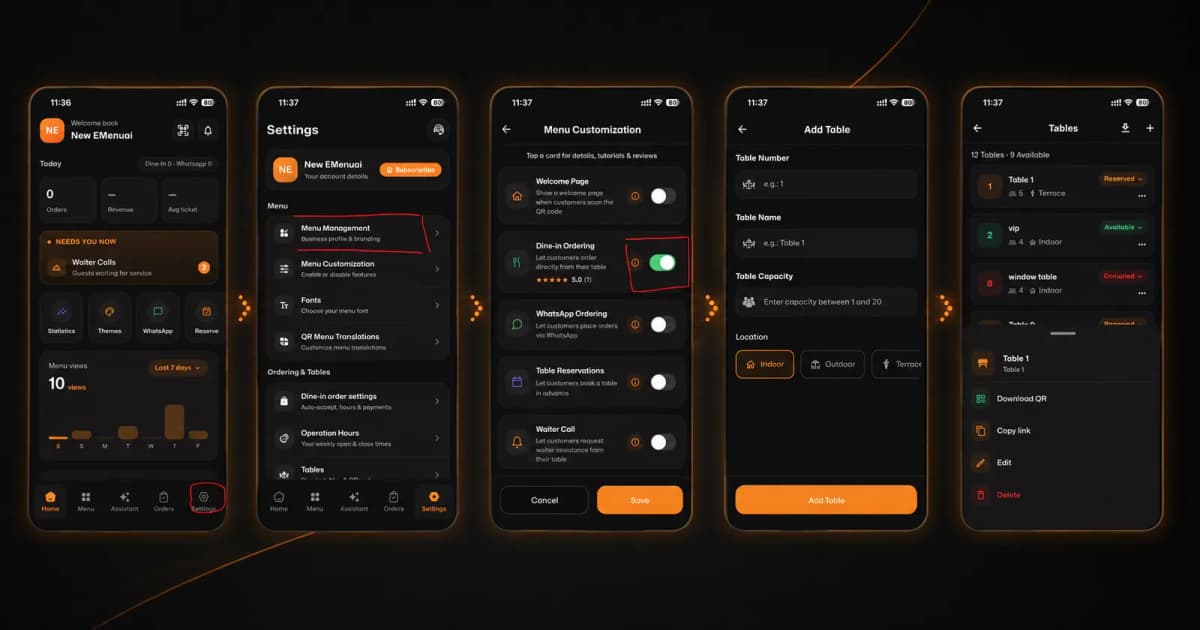
Tap on Settings in the bottom right corner.
Select Menu Customization.
Toggle the Dine-in Ordering switch to the ON position.
Step 2: Add and Manage Your Tables
Next, you need to set up your restaurant's seating layout:
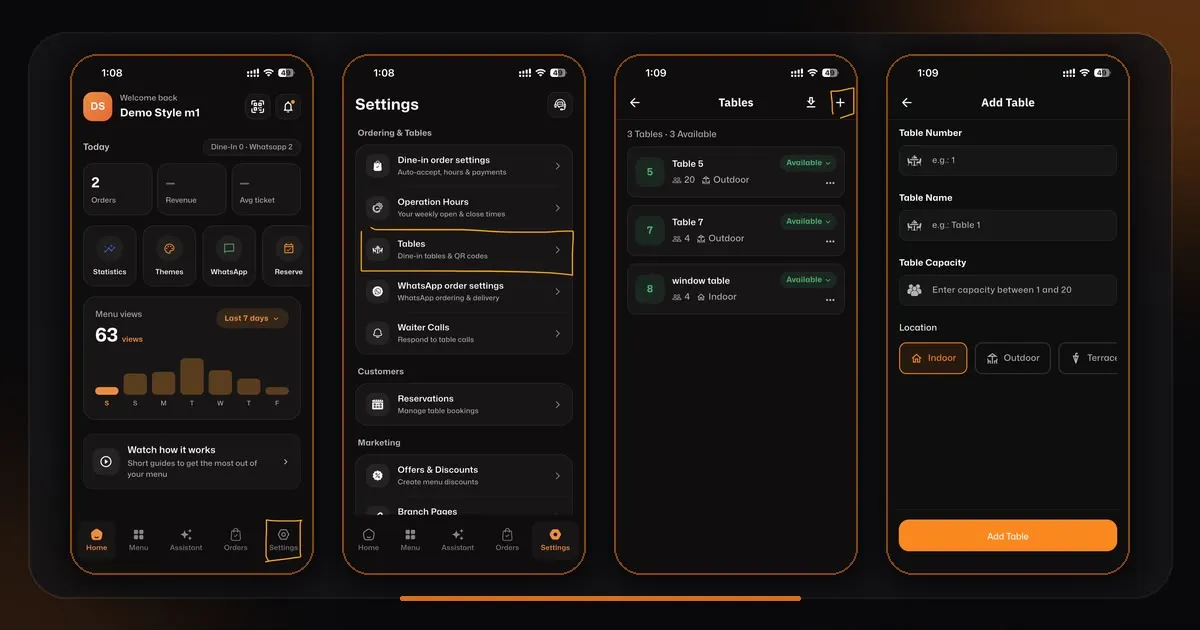
Go to your Tables menu.
Tap Add Table and enter the details: Table Number, Table Name, Table Capacity, and Location (Indoor, Outdoor, or Terrace).
Save your new table.
Step 3: Generate QR Codes & Receive Orders
Now it’s time to connect your customers to your digital menu!
From your Tables list, tap on any table and select Download QR to print and place it on that specific table.
You will instantly receive a "New Order Received!" notification directly on your phone!
🎉 Congratulations!
Your dine-in setup is complete. You are now ready to revolutionize your customer experience with eMenu AI!