Welcome to the next step in enhancing your customer experience! Generating a custom, branded QR code for your digital menu on eMenu AI is quick, easy, and takes just a few moments. Follow these 3 simple steps based on the image provided to get started:
📲 Open Your eMenu AI Dashboard
Ensure you are logged into your eMenu AI account and viewing the main home screen.
Step 1: Access the QR Code Creator
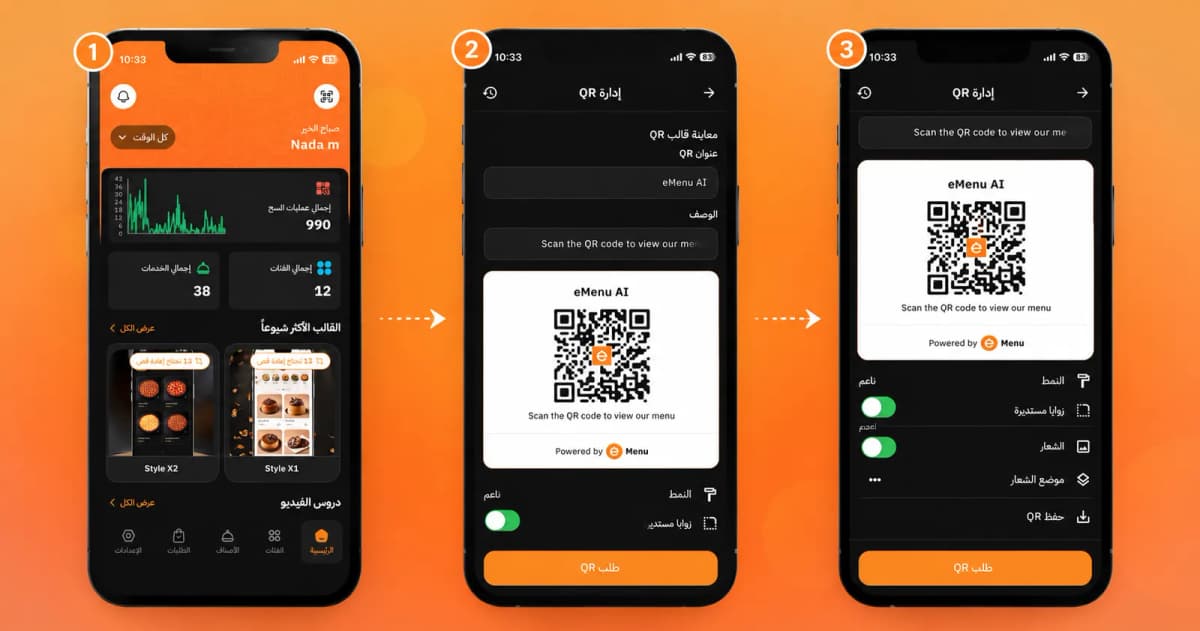
First, open the app to view your main dashboard, where you can see your total scans, categories, and services. To begin creating your code:
Locate and tap the QR code icon in the top-left corner of your screen (next to the greeting).
Step 2: Customize Your QR Details
Next, you will be taken to the "QR Code Creation" page. Here, you need to input the basic information that will display alongside your code. Please make sure to provide:
A Title of the QR (e.g., your restaurant or business name).
A brief Description (e.g., "Scan the QR code to view our menu").
Note: You will see a live preview of your QR code update in the center of the screen as you type!
Step 3: Style and Save Your QR Code
Now it’s time to make it match your brand! Scroll down on the same page to customize the visual look of your digital menu's QR code by:
Choosing your preferred Style (e.g., Smooth).
Toggling the Rounded Corners on or off.
Enabling your Logo and adjusting the Logo Position so your brand stands out in the center of the code.
Finally, tap Save QR to download it, or tap the large orange Order QR button at the bottom of the screen.
🎥 Watch the Registration Tutorial
Need a visual guide? Watch this quick video to see How to Create Your Custom QR Code on the eMenu AI App
🎉 Congratulations!
Your custom QR code is complete and ready to use. You can now print it, place it on your tables, and revolutionize the way your customers interact with your business using eMenu AI!